Biochar: First Time Making & Using
- helpinghensfarmri
- Dec 13, 2020
- 3 min read
I took the week of Thanksgiving off from work, and we ended up having better weather than expected. That allowed us to not only winterize the big coop floor, but finally get around to an experiment I've had on my list for a long time - making biochar!
Biochar, in simple terms, is just charcoal. Not those glued together briquettes you buy for the grill, but what you're familiar with if you use "lump" charcoal. From a sustainability standpoint, it's also an incredibly promising soil amendment, carbon sink, and nutrient and odor absorber.
The process of making biochar is to heat wood (or other biomass) in the absence of oxygen. This drives off first the moisture first, and later various gasses, and leaves behind just carbon.
If you go online, there are lots of ways to make biochar, including dirt pits, cone-shaped metal devices, or double-barrel systems. All pretty interesting and cool, but I was looking for a low-tech, inexpensive approach to making our first few handfuls of biochar.
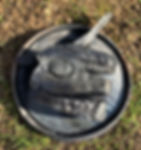
We landed on a couple of clean, empty metal paint cans that we purchased at our local big-box home center for less than $6 each. We poked a few holes into the bottom of each can with a nail, filled it with dry wood pieces, and hammered on the lid.
Then, the two cans were placed into our backyard fire pit and a fire is lit.

As you can see, the fire is nothing fancy...literally a mix of scrap wood from various projects (mostly pallet scraps), some dead sticks from around the yard and wood line, and just enough paper/cardboard to get things started.
As you can see from the picture below, the fire got going strong in a hurry.

As things heated up, we started seeing white smoke (actually steam) coming out of the paint cans...this was from the heat driving moisture.
Within minutes (which surprised me, because I'd heard it took a while), the water was driven off, and then various other gasses began to be driven off the wood. These gasses are flammable, so as they were driven off by the heat, they flow out the nail holes and catch fire. So, the biochar helps heat itself!

Dueling paint cans:

We had the campfire going for a couple of hours. Long before the fire went out, the "torches" out of the nail holes had stopped, which meant that everything had been driven off the wood and only carbon would remain.
When the fire was just about out, I tipped the cans upright so the air holes were face-down. We let the fire go out and cool overnight.
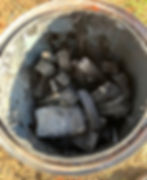
The next morning, we cracked open the cans...and success! Biochar!

Volume-wise, the charcoal remains roughly the same size as the source wood, but from a weigh perspective, it's much lighter and will easily snap between your fingers.

The two cans of biochar went into a bucket where I broke it into smaller pieces. This was done with another low-tech approach...a scrap of 2x4 lumber used to crush the biochar against the bottom of the bucket.

I put this small amount of biochar into the bedding of one of our smaller coops, with the idea that it'll help absorb some of the nutrients in the chicken manure. I was actually amazed how much that small amount of char reduced the odor in the coop significantly....for weeks.
From the coop, the char will make it's way with the rest of the spent bedding into our compost pile, where the chickens will work it over. When the compost gets spread around the property, the biochar will go with it. Biochar and compost together are great for water retention, nutrient retention, and soil microbiome health.
The process worked great, and I expect we'll continue to make more biochar every time we have a backyard fire for entertainment or to clean up scrap wood. Once the paint cans are no longer usable (I imagine after a few fires), we'll likely upgrade to a small metal trash can to see if we can scale up slightly.
When we give that a try, we'll blog about our findings.
